I recently purchased a used 2005 HL and have made a few improvements to the sound system, exterior lighting and most recently the power window switch console. Other drivers in the household have often complained about not being able to locate the driver side passenger window controls and power door lock switch in the dark.
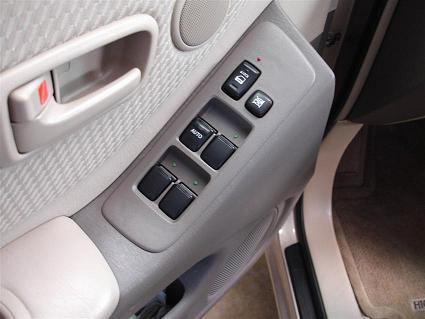
Here’s how the switch panel came out after my project was completed…
PARTS NEEDED
- 1 Red and 3 Green Low Intensity 3mm LEDs
- Two ? watt resistors: 82k and 270k ohms
- A few small sizes of heat shrink tubing
- 18 or 20 gauge stranded hookup wire (whatever you have)
- Wire-ties, 2-insulated spaded type crimp terminals, 2-quick splice t-taps and solder.
- Tools: Soldering iron, drill press, small diagonal cutters, crimp
tool and durable adhesive (either epoxy or my favorite GOOP).
PULLING THINGS APART
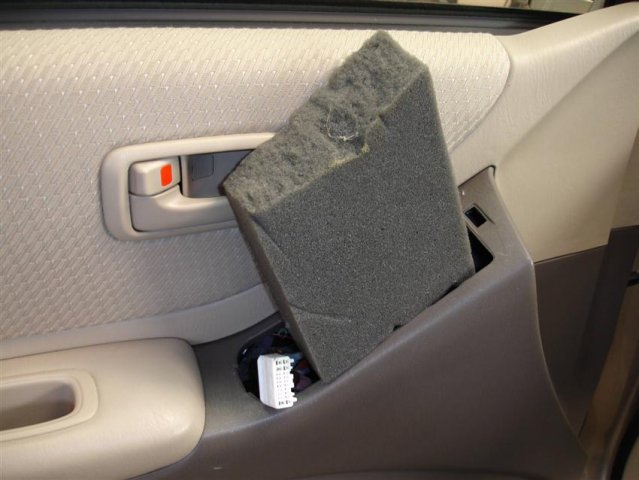
Start by removing the power window switch assembly. I just pried-up the trim piece with my finger nail – but you may need to use a screwdriver that’s been wrapped in some tape (to protect the plastic finish)…
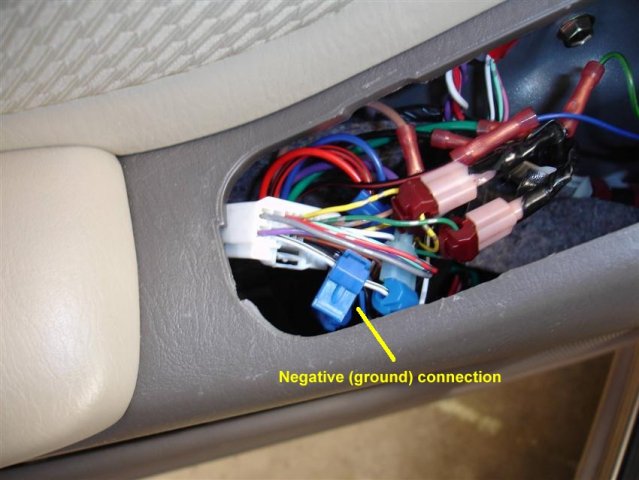
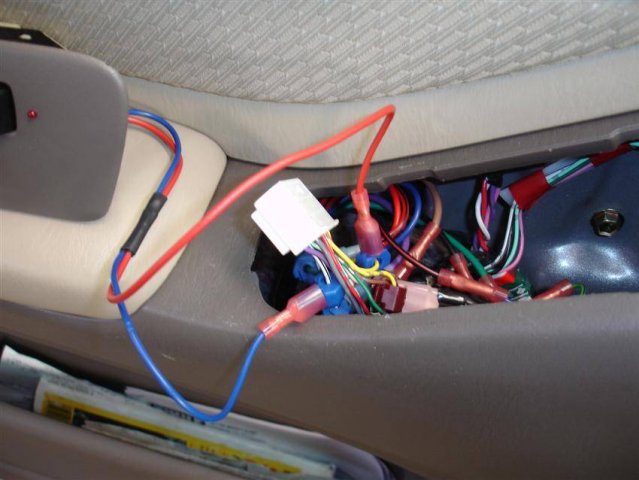
I found a surprise when I pulled the switches out (see yellow circle). Previous owner had installed an aftermarket remote starter and alarm system. Most of the system had been removed before I purchased the HL, but some remnants remained – just ignore all that mess, your ride won’t have it…
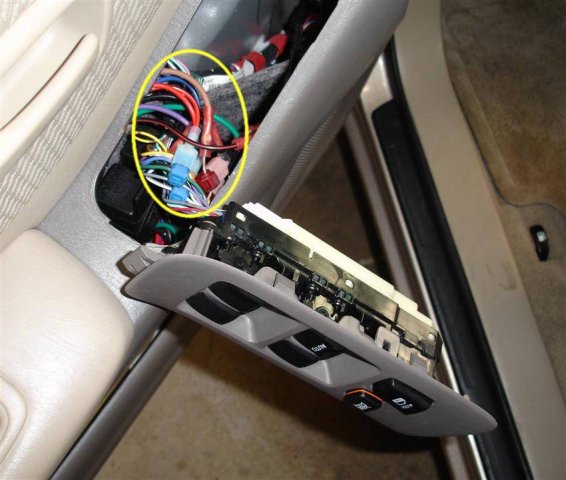
Unplug the switch assembly from the wire harness plug by squeezing the release tab and pulling things apart.
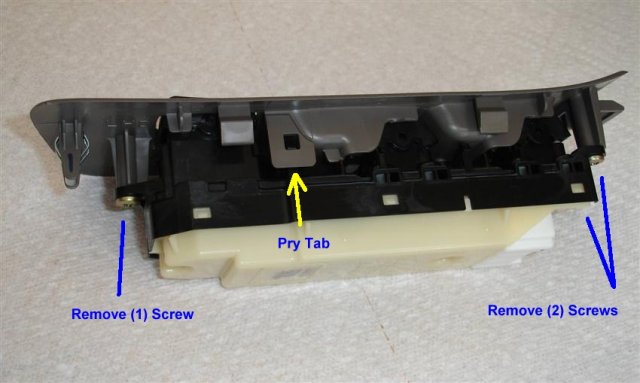
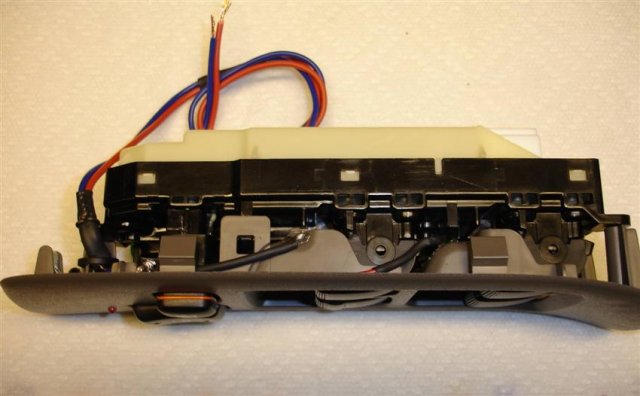
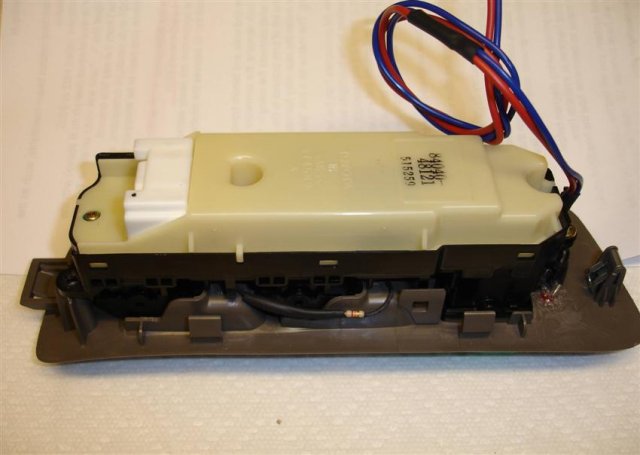
Next step is to remove the switch-controller assembly from the trim piece. Very easy to do – remove the 3 rear screws and pry up on the side retaining tab while tugging on the switch assembly. There’s another tab on the other side that needs to be disengaged too…
Once the switch has been separated from the trim piece it can be temporarily reinstalled. Start by inserting some foam blocking or other filler material into the door cavity. It didn’t look as if anything would get caught in the window gearing – but just inspect carefully to make sure your filler material is safe…
I then wrapped an old t-shirt around the wiring harness/connector to provide filler for the rear portion of the switch assembly (just tuck things into place)…
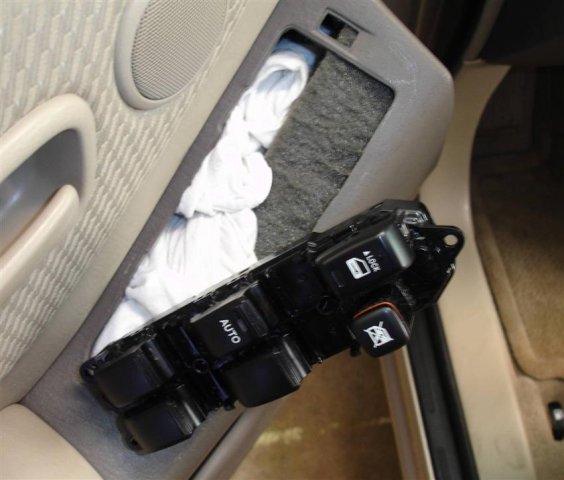
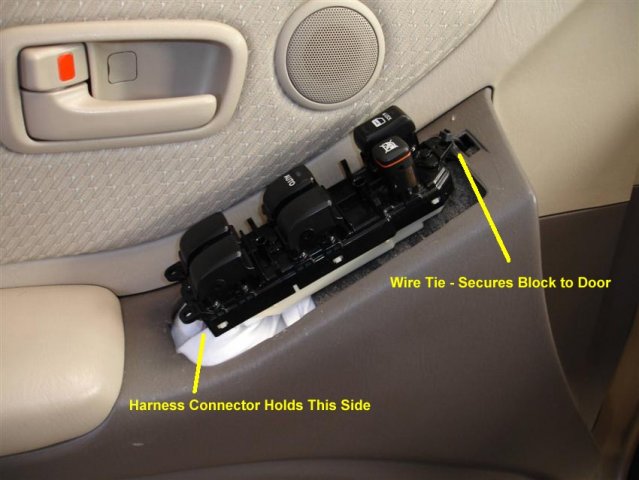
Here’s the temporary switch re-installed (it ain’t pretty but it works just fine – drove the HL a few days this way!)…
Caution: The switch (and insides of door panel) are less protected from rain when the door is open, so just keep this in mind.
CONSTRUCTION
Now for the fun – take the separated trim piece into your shop for some real work!!!
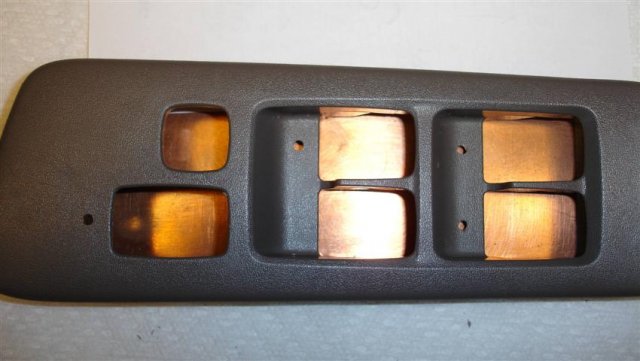
First step is to drill all the holes for the illumination LEDs…
Here’s how the drilled holes look from the finish side…
Next, use adhesive to install the new illumination LEDs into the drilled holes. Note: The LEDs need to be wired in a certain way – they are polarity sensitive (ie., need a plus and minus connection to the power supply lines). Look just below to see pictures of the + and – orientation that I used. If you are not familiar with LED wiring, here’s a good link to get you up to speed
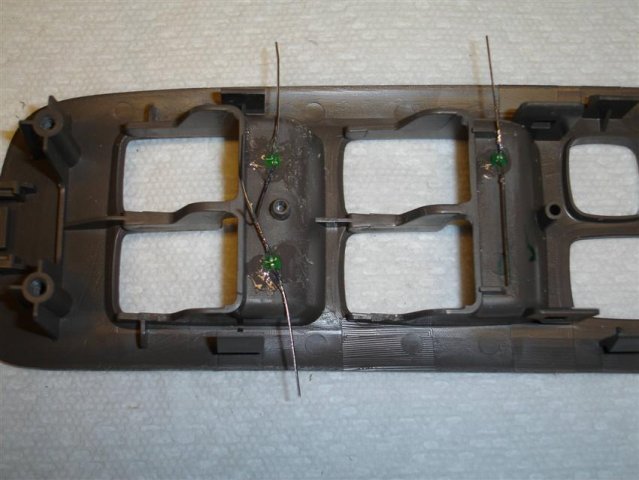
Once the LEDs are secured, it’s time to do some point to point wiring of the circuitry. Here’s circuit that I’m using …
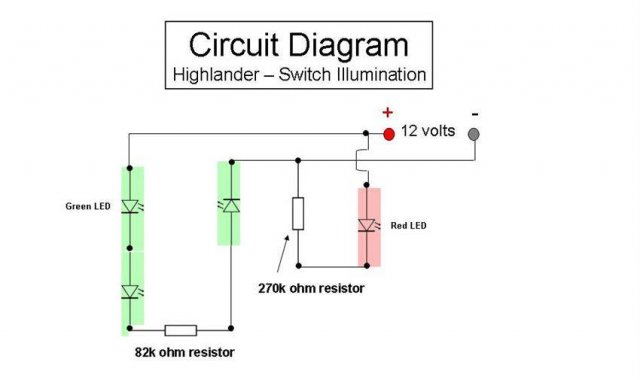
Note: I deliberately picked high value resistors for this application. Ran some tests with my LEDs and found these resistors kept illumination to a nice low level. I wanted to match the green glow of the lamp inside of the driver’s side window button – the idea is to find the button area, not distract the driver with bright green and red globes. These resistor values may differ for the LEDs you are using – figured I’d at least give everyone a value selection starting point!
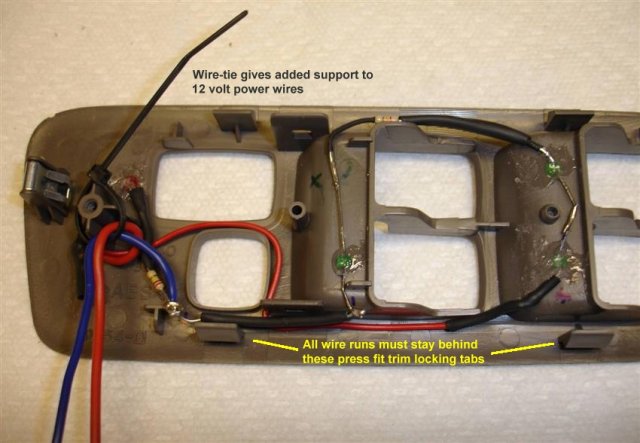
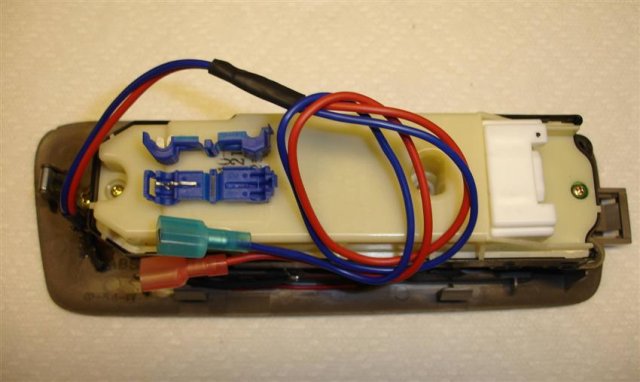
Here are few shots of the point to point wiring used …
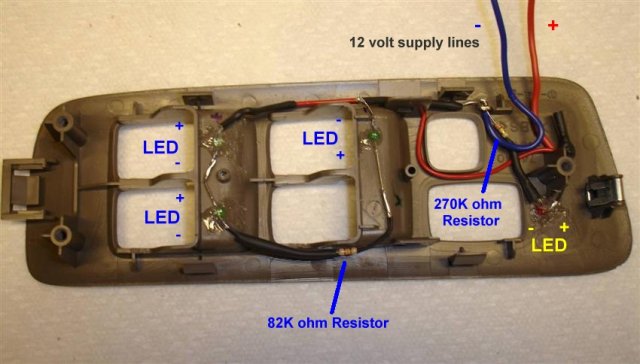
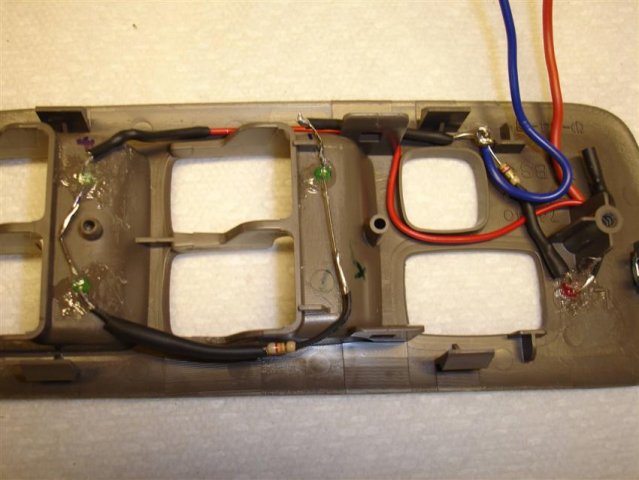
Note: I did apply (not pictured) additional adhesive to anything that was loose or wiggled (ie., resistors, lengths of wire, etc) – wanted to be sure any vibration impacts over time were minimized.
Here are some shots of the re-mated switch and trim plate…

Finally ready for installation – will be using T-Tap quick splice connectors to tie into the HLs power system. The Red/Blue power wires then plug into the T-Tap connections.
INSTALLATION
The T-Tap quick splice connectors attach to two wires on the door’s wiring harness. A Yellow wire (key switched +12v) and a White/Black wire (ground). The T-Tap fits around the line and is squeezed closed (with pliers) to make the quick splice.

CAUTION: Very important to get these connections right -- don't want the power windows doing strange things!!!
Here are the power wires plugged into the T-Taps…
Note: Connections are only made to the HL's power supply lines, they don't have anything to do with the window or lock control systems.
FINAL WORDS
I snapped a few pictures showing how things look in dim and dark lighting conditions – pretty happy with the outcome!!! I’ve been asked if I can do a similar mod on the passenger side controls – will need to look into available (if any?) voltage tie points for that door’s harness.
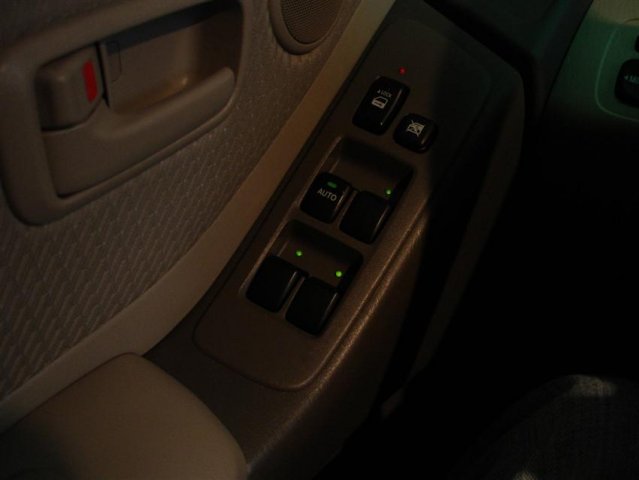
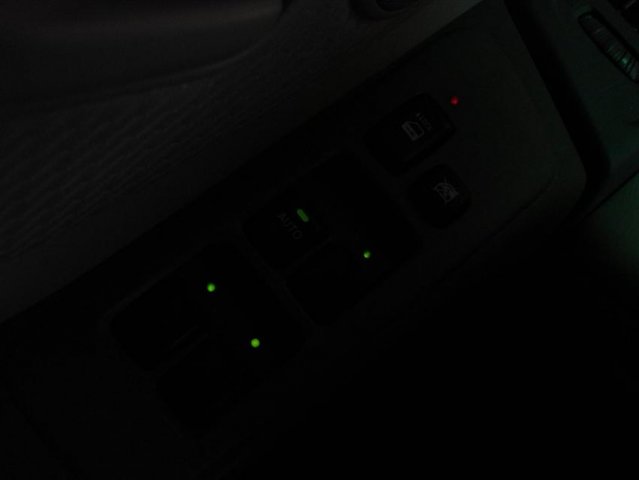
Note: The new illumination LEDs activate whenever the car is started – they are just bright enough to only be noticeable under dim and dark lighting conditions.
I’d be willing to do this mod (for a fee) if there’s some interest out there? All I need is the switch trim plate – you keep the switch and mount it (temporarily) as I did. Message me using the forum’s private mailbox for more details.
вот еще пара ссылок по этой теме:
http://www.toyotanation.com/forum/showthread.php?t=235303
http://www.toyotanation.com/forum/showthread.php?t=236527